

How Our Process Works — How to Remove Lice from Hair Permanently
Confirm & book: Tell us your situation and pick a time. We’ll explain prep and answer questions about places that treat lice near me.
Precision treatment: We apply targeted heat, then section and comb every strand to remove bugs and nits.
Finish & verify: We use a safe oil to reveal stragglers and verify the clean result on a white towel.
Aftercare & prevention: You get a short home plan that protects the result and prevents re-infestation.
What to expect at your appointment:
Plan for about 30–60 minutes depending on hair length and density. You’ll sit comfortably while the technician sections hair, works methodically from scalp to ends, and wipes the comb onto a white towel so you can see what’s coming out. We explain each step during the lice check and treatment, show progress as we go, and answer questions before you leave with simple written aftercare.
Start your lice treatment today—clear, fast, and family-friendly.

Lice Checks — The Lice Charmers Way
You can learn how to check yourself for lice or how to check for lice on your own head, but even with mirrors and combs, it’s easy to miss nits close to the scalp — especially if you have light or thick hair. Lice move quickly, and a missed egg can restart the infestation.
At Lice Charmers, professional tools and experience make the difference. Our trained eyes spot what others can’t, giving you fast, certain results.
Don’t spend hours guessing — let Lice Charmers confirm it once and for all.

We’ll show you what we find, so you can see for yourself.
Years of experience & and counting
How to Check for Lice & Nits (Lice Eggs)
Types of Check: Dry Checks vs Wet Checks
If you’re in a pinch for time, do a quick dry check.
If there is a high risk of exposure and you have time, do a wet check. We only do wet checks on our clients because they are much more accurate.
How to Do a Dry Check
- Go to a well lit area.
- Use a rat-tail comb or pencil and part the hair on the nape of the neck, around the ears, and the crown of the head.
- Inspect the scalp for anything in the lice identification section below.
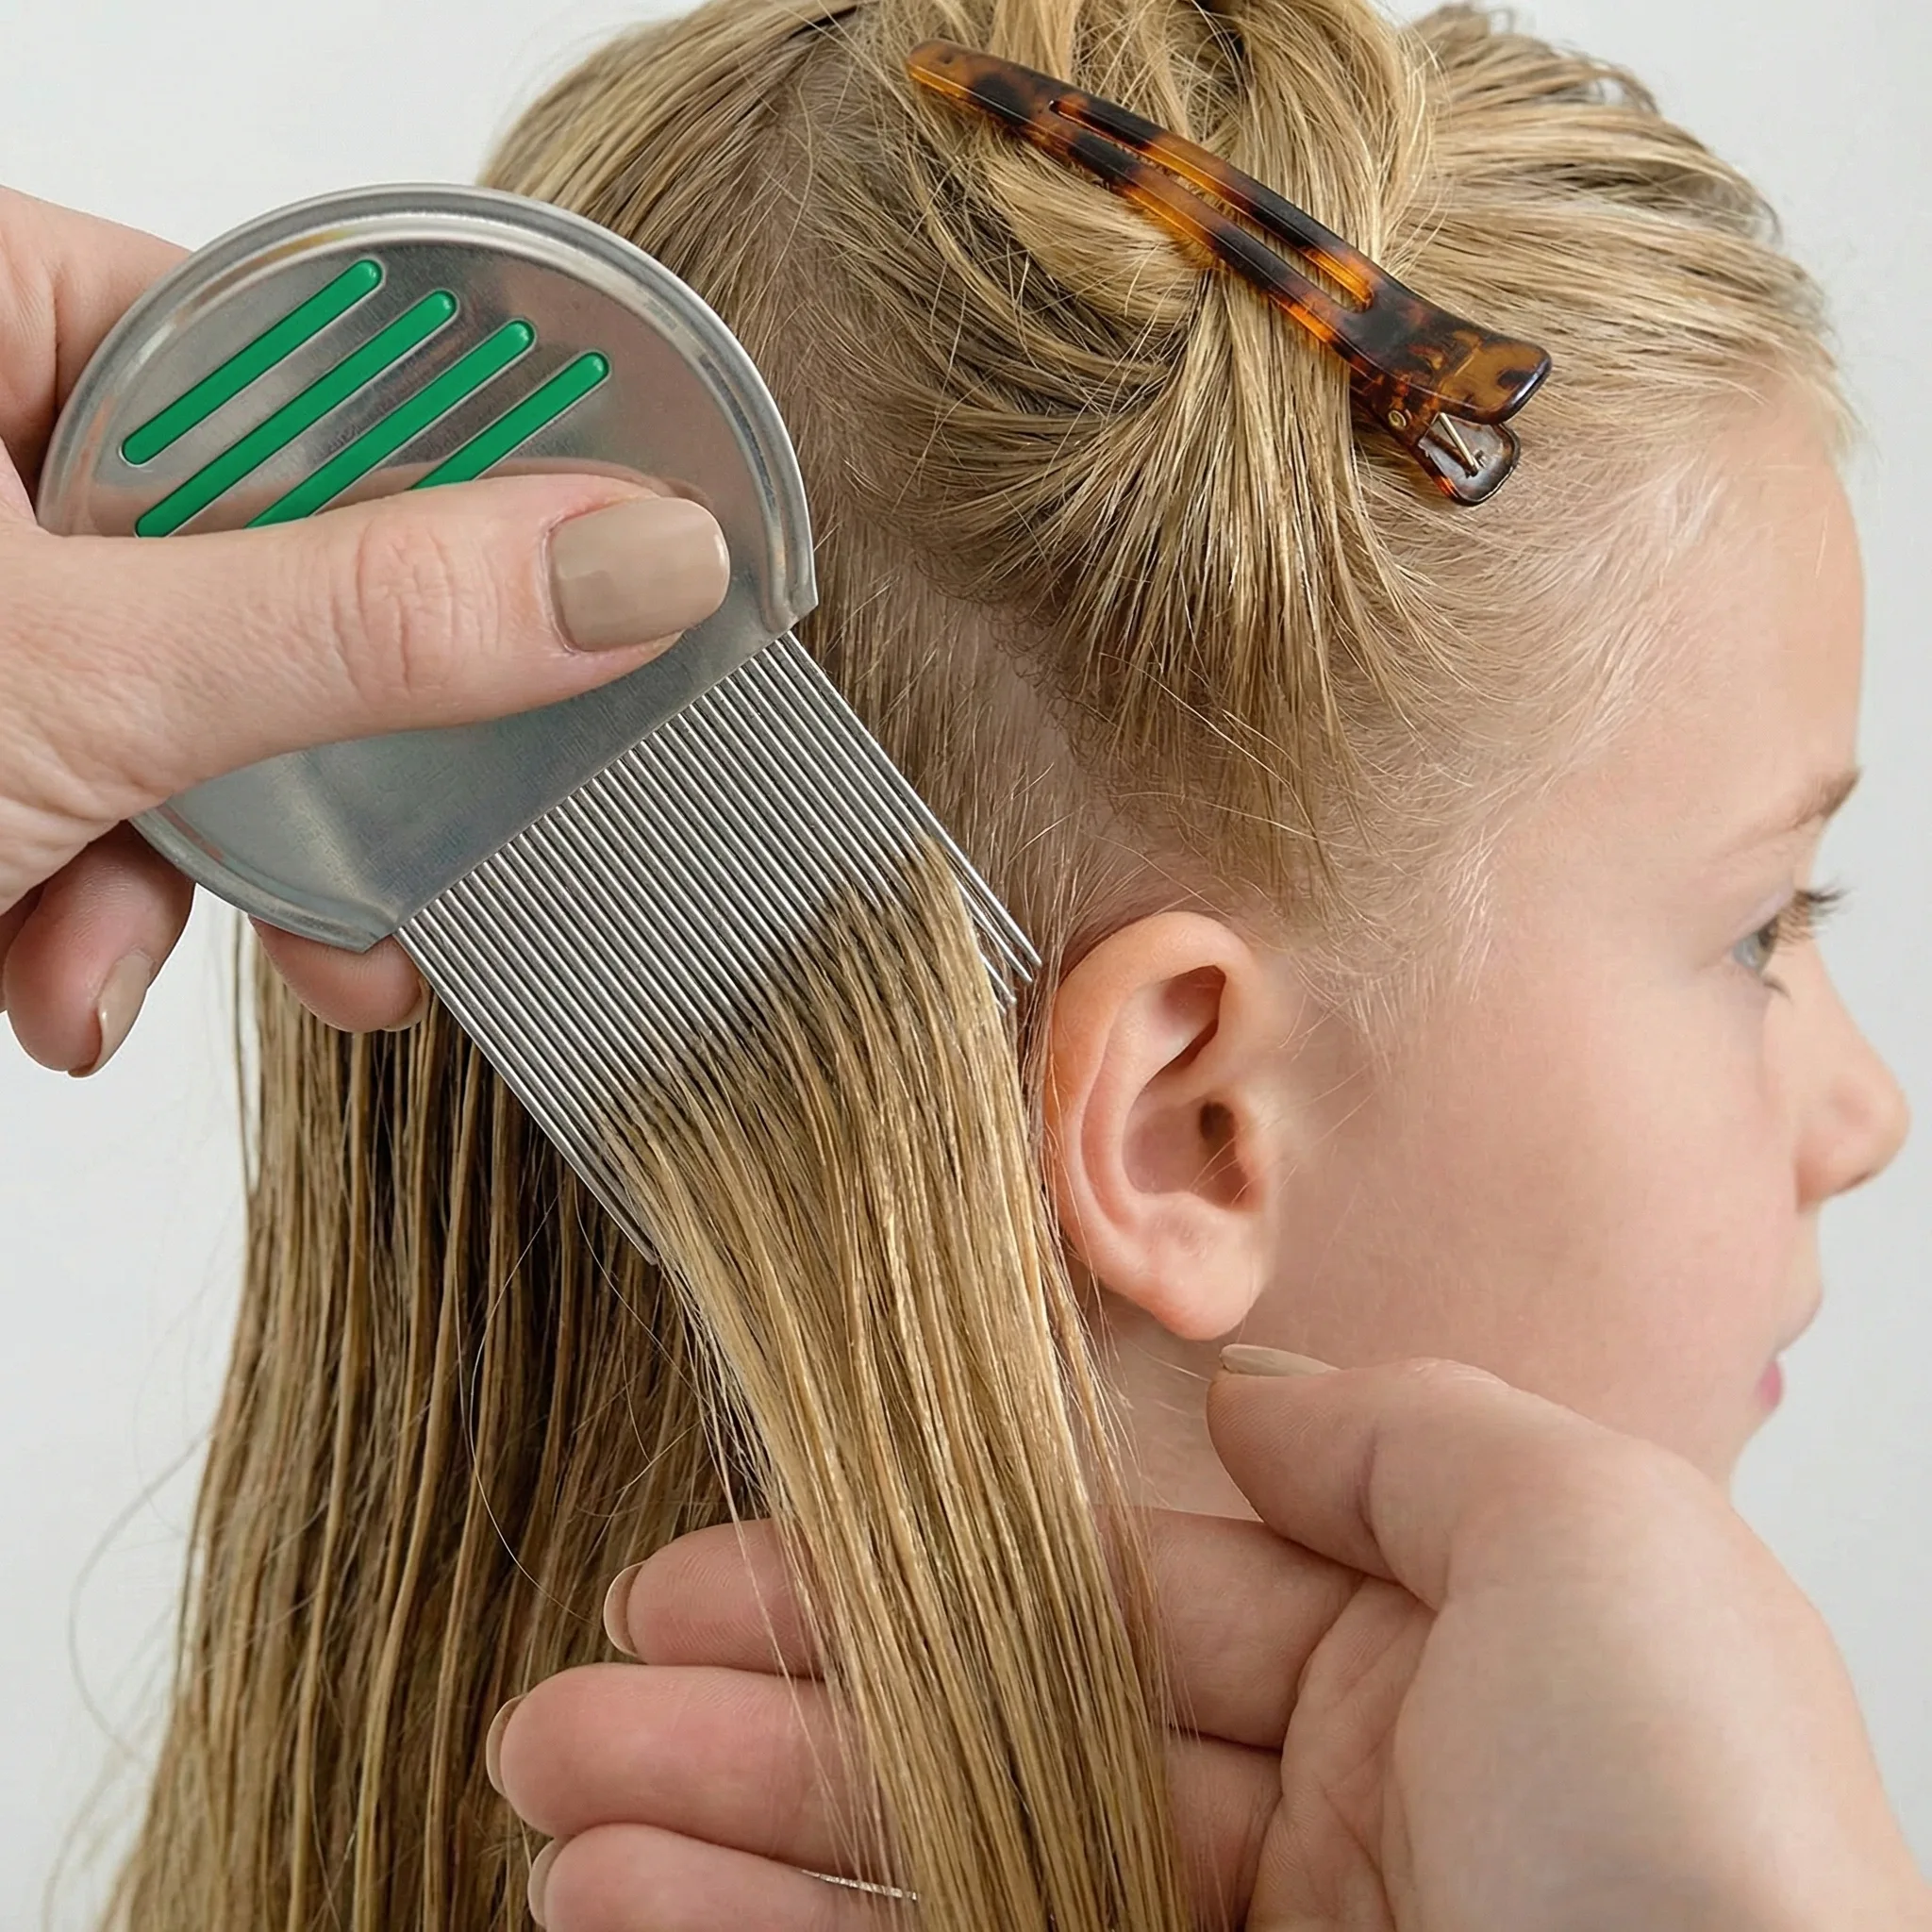
How to Do a Wet Check
Supplies: paper towels, hair conditioner, detangling brush or comb, and a metal-toothed lice comb.
- Wet the hair and massage a small amount of conditioner throughout to prevent snagging.
- Hold the lice comb at a 15-degree angle to the scalp and comb from roots to end in one smooth motion.
- Wipe the comb with a paper tower and compare anything you find to the lice identification section below.
- Comb through the entire scalp in every direction, checking with the paper towel as you go.
A professional wet check takes 20-30 minutes, depending on the thickness, length, and texture of the hair.
Expect to take at least double that time for your checks because one or two missed bugs or nits is all it takes to keep a lice infestation going.
Professional lice checks are available at our clinics or in-home appointments.
Lice & Nits Identification Mini-Guide
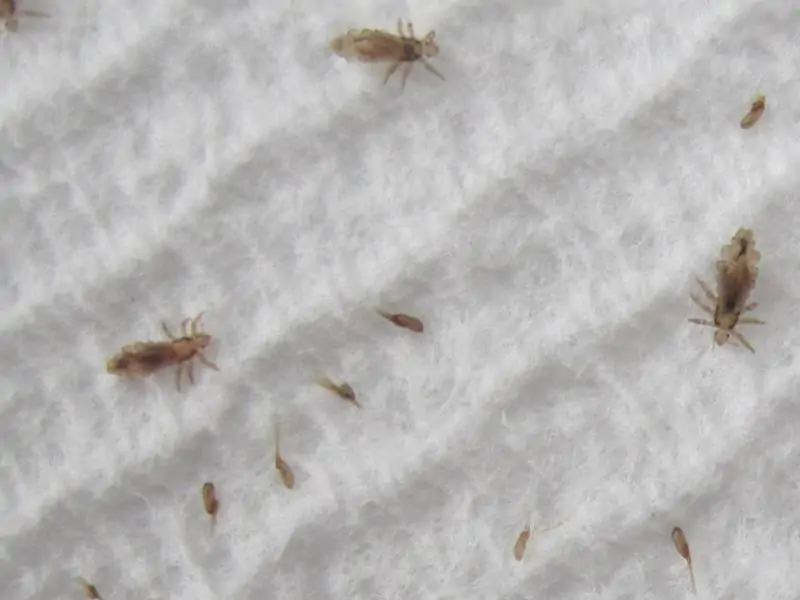
Head Lice

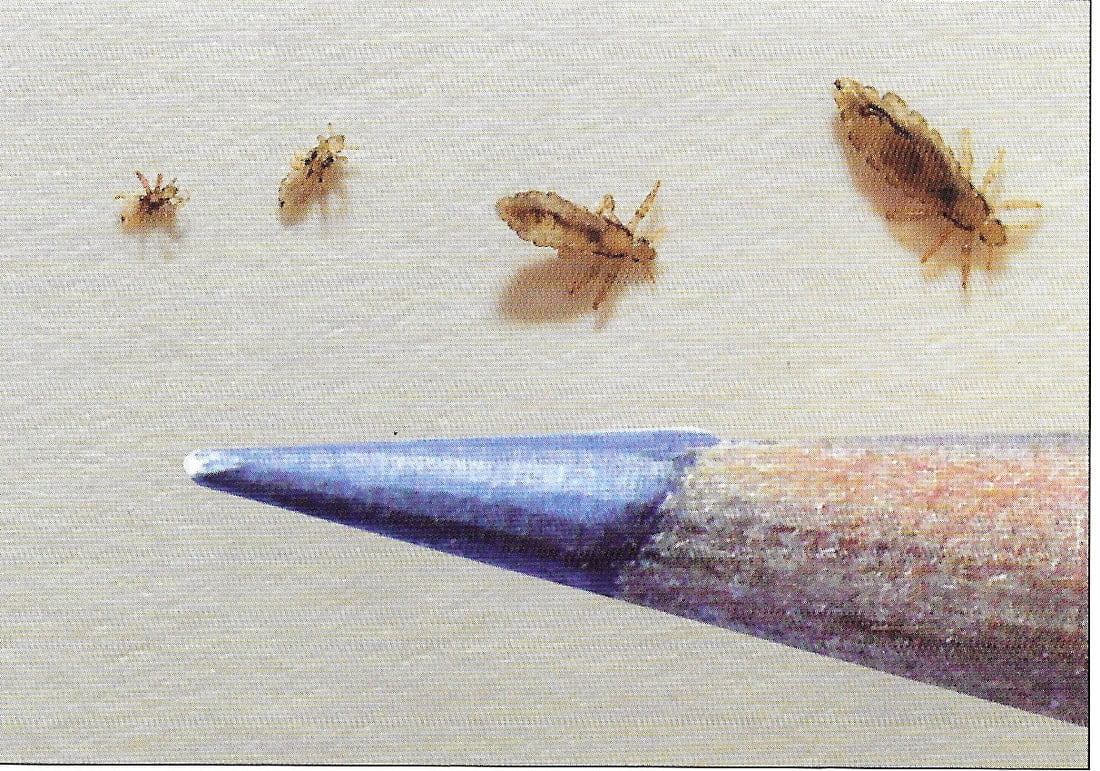
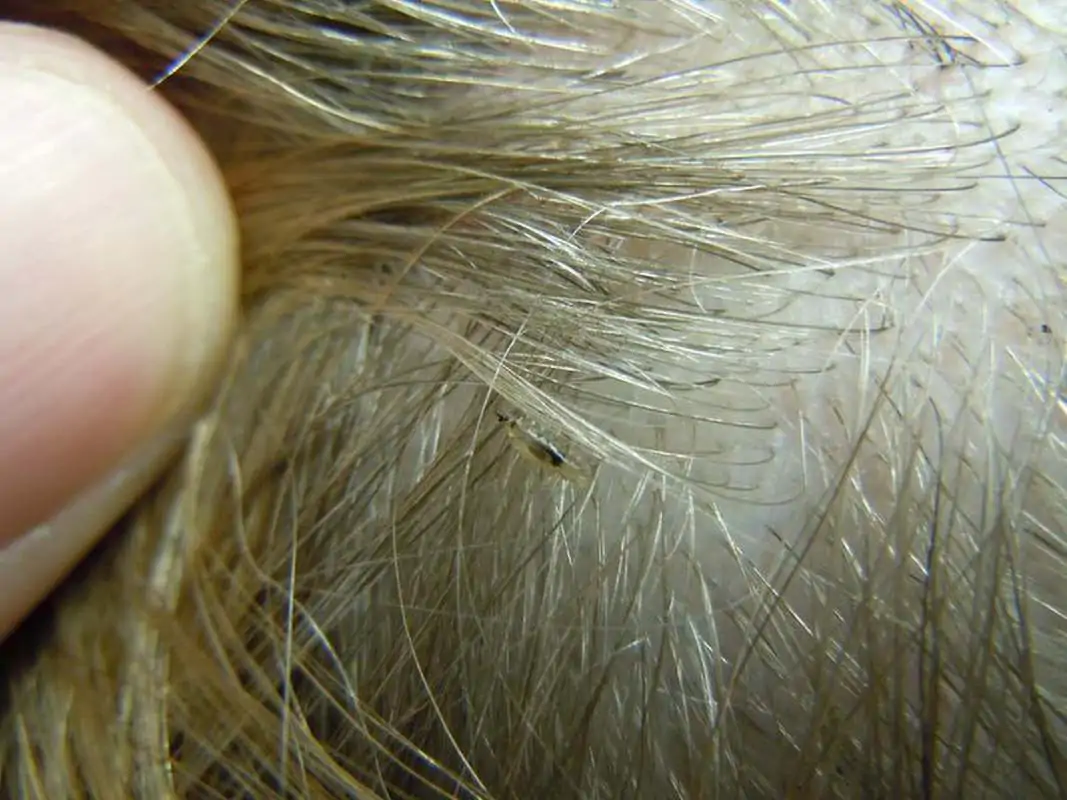
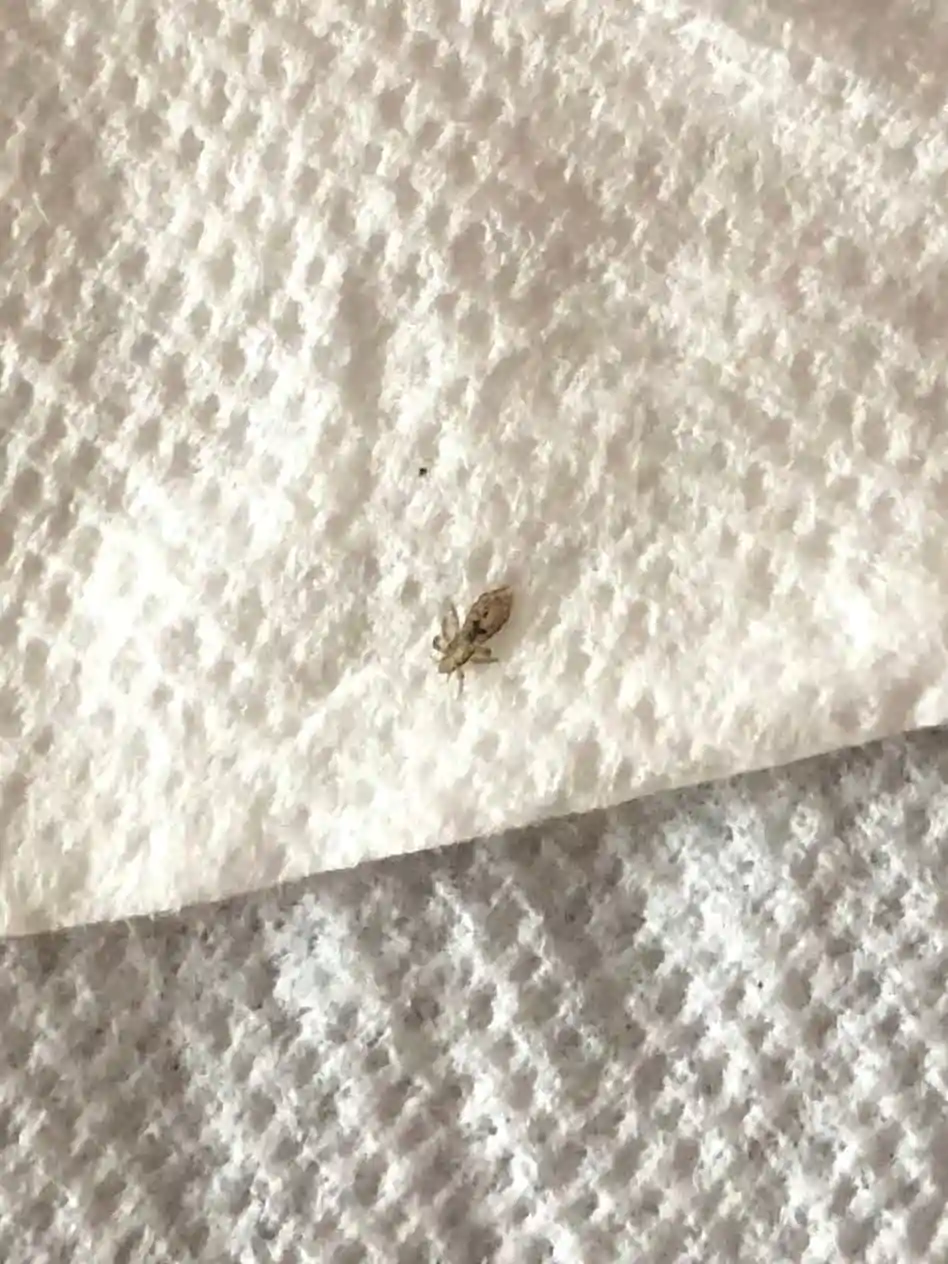

- Six-legged
- About the size of a sesame seed when fully grown.
- Translucent when not digesting and brown to reddish brown when digesting.
Nits
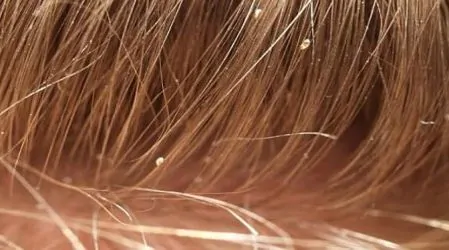

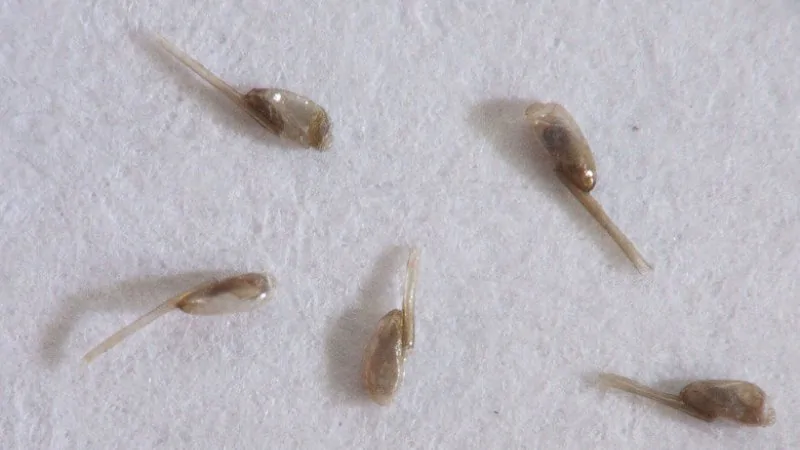
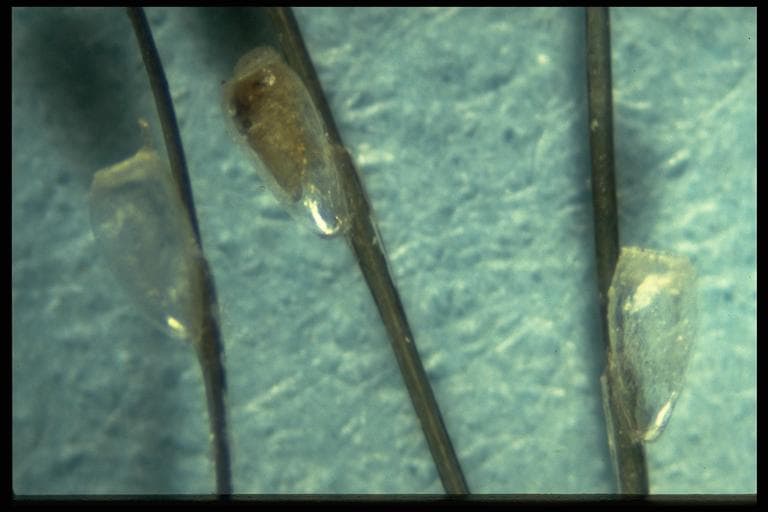
- Shaped like a teardrop
- As small as a grain of salt
- Are light to dark brown when viable
- White when empty/hatched
- Securely glued to the hair shaft
If it’s easily flicked or blown away from the hair, it is not a nit.